

Marbling Stationery Guide

In our digital world, snail mail is a rare and fun gift! Who doesn't love getting a letter in the mail that's beautiful but also encouraging?
This month, take a moment to make some cute stationery and remind your friend how Christ sees her through a sweet note.
Let's get started!
First, let's gather all of our supplies. (See the list below!)

SUPPLIES NEEDED:
A pan or baking sheet
Spatula
Can of men's shaving cream
Liquid or gel food color
Stationery or envelopes
Newspaper or kraft paper
A ruler
Optional: Washi tape if you want fun designs
Then, follow these steps!

STEP ONE
Pour shaving cream into a container big enough to fit the size of paper you are using. We went with a 13x9-inch baking pan but could have easily used a raised baking sheet or a small plastic storage tote.

STEP TWO
Choose your colors! We used gel food coloring and heard it works best, but liquid food dye should work too.

STEP THREE
Sprinkle dots of the colors you want to be on your envelope or stationery. (And just a heads up: with gel dye, we found the colors appear much darker than they turn out to be.) If you feel like you've done too much of one color, don't worry! You'll be able to fix it in the next step.

STEP FOUR
Let the marbling begin! With a spatula, fold the shaving cream to mix the colors. You can fold it as little or as much as you want! Doesn't it look dreamy?!

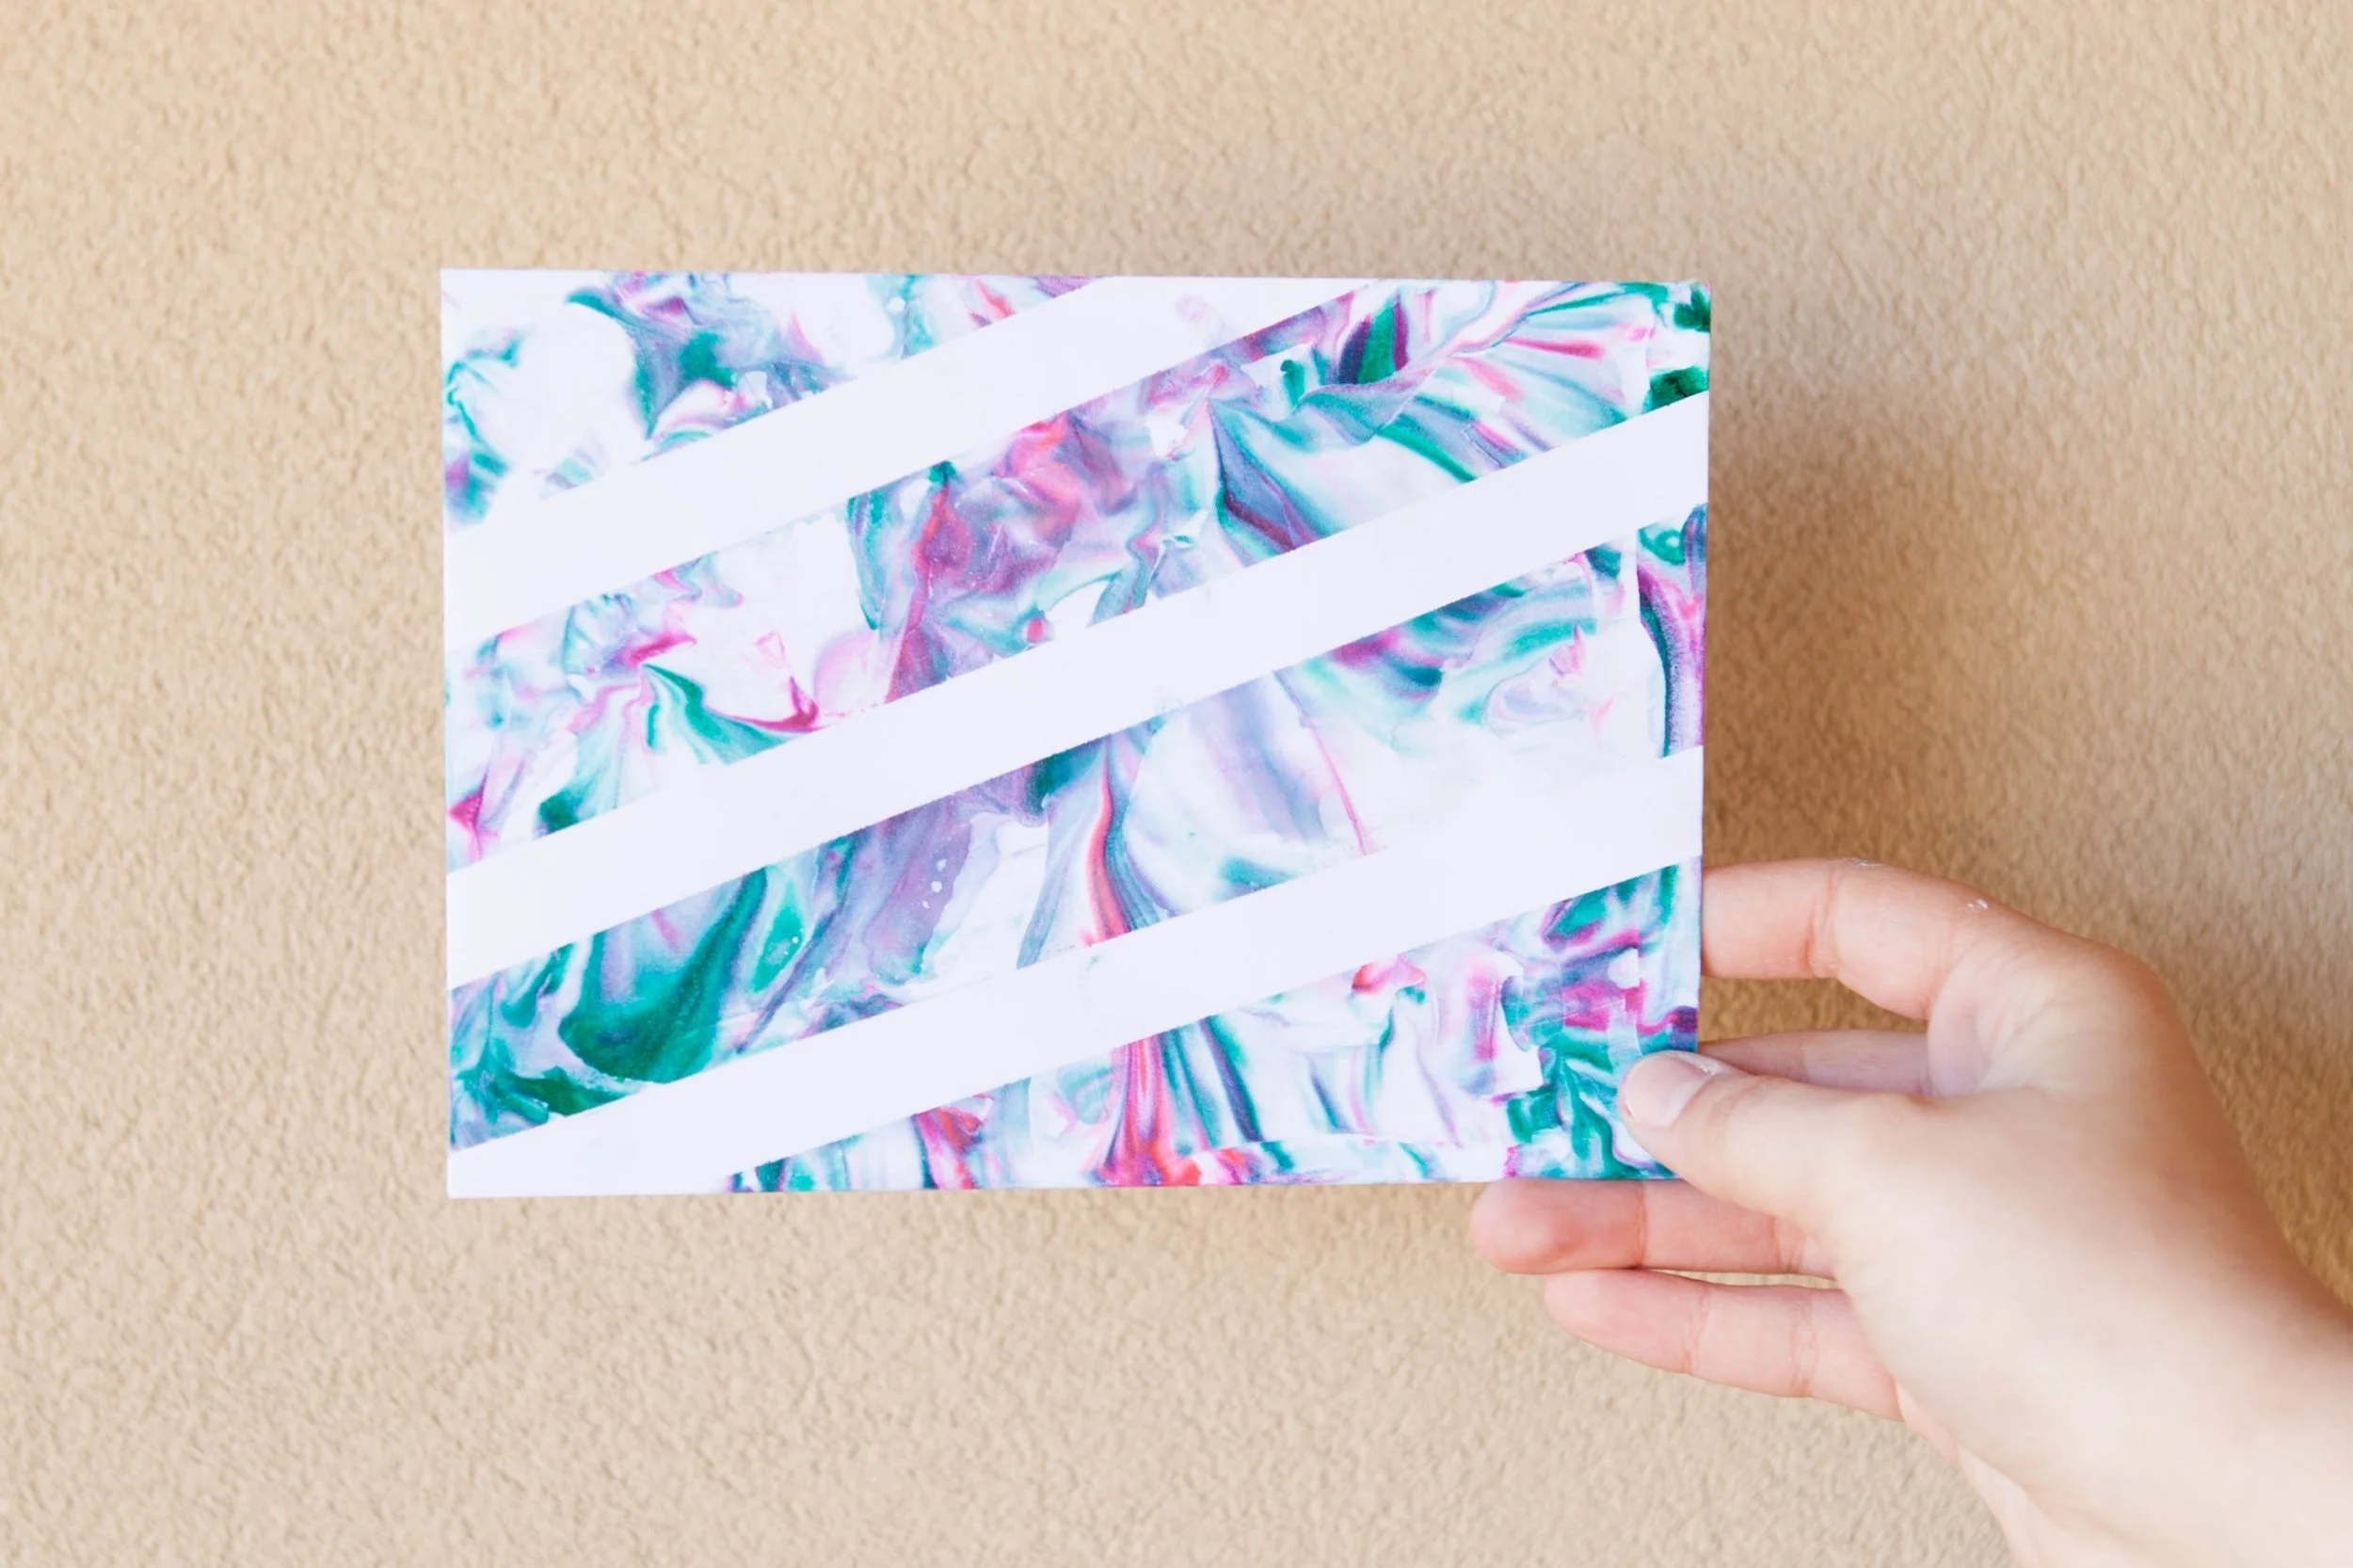
STEP FIVE
Choose what design you want to have on your envelope or stationery! If you are looking for a marbled look, tape the edges on the backside of the envelope. If you want a zigzag design, place tape on the front and the back. (It keeps it from bleeding through.) Then, place the paper in the shaving cream. Make sure all of the surfaces are touched!

STEP SIX
On a flat surface, lay some kraft paper or newspaper down. This step will get messy! Take the envelope and your ruler and wipe off the excess shaving cream.
STEP SEVEN
Lay the final product in between two pieces of paper. Add a heavy textbook or object on top to help it dry quicker. Within 15-20 minutes, it should be fully dry and ready to write on and send. Enjoy sending pretty snail mail or letters to friends and family!